
Introduction
This is quick setup for setting up OpenCV3 64 bit version on Windows system for C++.
I tested this setup for OpenCV3 on Windows 10 64 bit with Visual Studio 2017 Community edition. It can also work on other Visual Studio editions.
This setup includes debug and release build for 64 bit only. You will be able to make new OpenCV3 C++ project with one click instead of configuring new project each time with this setup.
1. Install Visual Studio and OpenCV 3
Visual Studio Community edition is free. Download from this link or you can install other Visual Studio editons but it must include the Visual C++.
While installing Visual Studio select Visual C++, setup will download and install Visual Studio on system. It is big download so be patient.
I used OpenCV 3.4.2 in this setup. To use another OpenCV3 version, you have to follow extra Step 4. Download OpenCV3 installer from this link
Run OpenCV3 setup. Note down path where it extracted files.
2. Set Environment Variables
This is important step follow it carefully.
To modify or add new environment variable in Windows, right click on “My Computer” > “Properties” > “Advance System Settings” > “Advance” > “Environment Variables”
You have to add two environment variable
-
OPENCV_DIR
Create new variable OPENCV_DIR give value of path to bin folder of setup that you noted in Step 1. In my case path it is “C:\opencv\build\x64\vc14\bin”.
-
PATH
Append new value "%OPENCV_DIR%" to existing values of PATH variable.
Second path variable is require as OpenCV3 require “opencv_worldxxx.dll” in path to program work, where “xxx” changes with OpenCV version.
3. Configure Visual Studio
-
Download project template form here
-
Copy template zip file in folder “C:\users\username\documents\visual studio 2017\Templates\ProjectTemplates”.
-
If you changed the environment variable while Visual Studio is open then restart Visual Studio.
4. Modify template for different version of OpenCV3
If you are using OpenCV 3.4.2 then go to Step 5. If you are using different OpenCV version then follow this step.
In this step we are modifying the project then export project template for your OpenCV3 version.
4.1 Create project
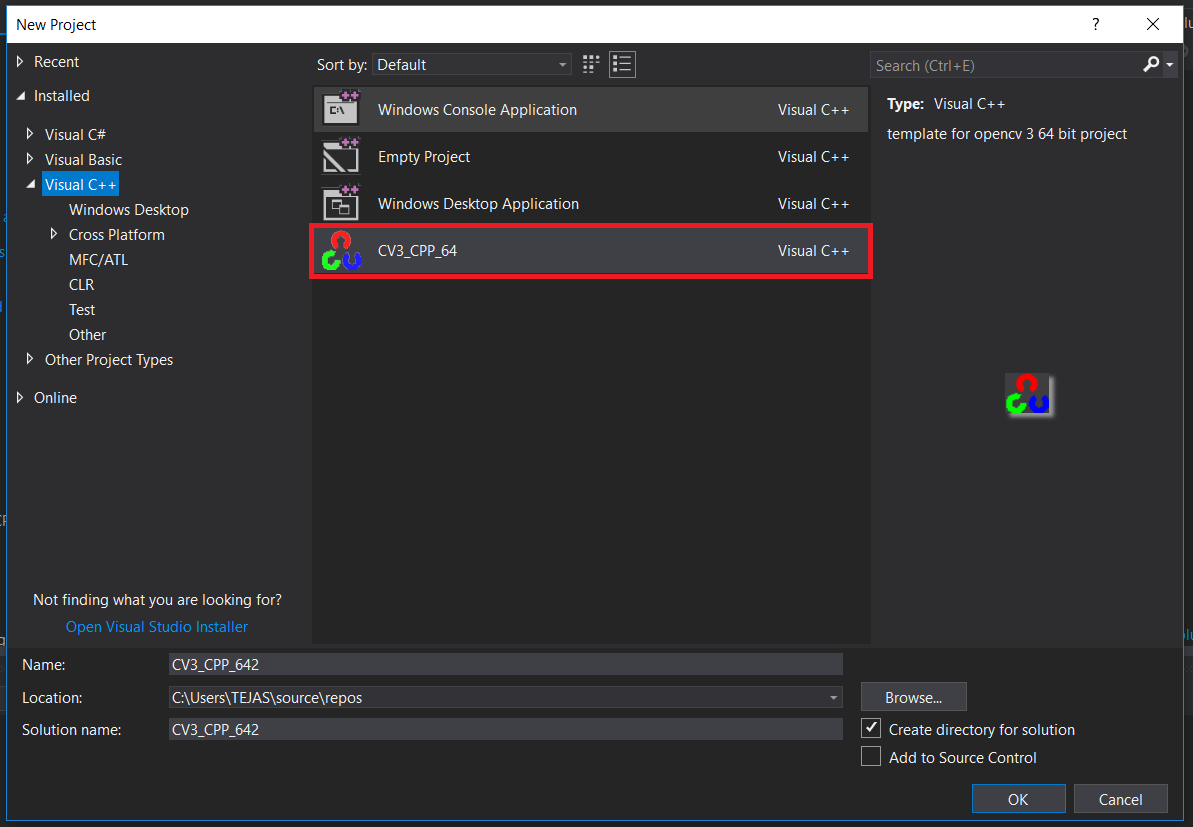
Open Visual Studio then “File” > “New” > “Project” > “Installed” > “Visual C++” > “CV3_CPP_64”. Give project name “CV3_64_NEW” then press “OK”. It will create project.
4.2 Modify Project
- In solution explorer right click on the project name then “Properties” > “Linker” > “Input” > “Additional dependencies”
- Change “opencv_world342.lib” to “opencv_worldXXX.lib” where XXX is your OpenCV version then press “OK”.
- Repeat the above 2 steps by selecting debug build, change “opencv_world342d.lib” to “opencv_worldXXXd.lib”
4.3 Save New Project Template
- Go to “Project” > “Export Template” > Choose Project template > “Next”.
- Give template name like CV3_XXX where XXX is your OpenCV version.
- Fill description, give icon if you want it is not necessary.
- Check the auto import option.
- Press “Finish”.
It will open the window which contain your modified Project template. Copy Project Templates for future use.
4.4 Remove Old Project Template.
To remove project template from Visual Studio, delete project template zip file from “C:\Users\USERNAME\Documents\Visual Studio 2017\Templates\ProjectTemplates”.
4.5 Use New Project Template
If you check auto import option in Step 4.3 then skip this step.
To use the new template zip of Step 4.3 copy to “C:\Users\USERNAME\Documents\Visual Studio 2017\Templates\ProjectTemplates”.
5. Create and test OpenCV3 project
Create new project by “File” > “New” > “Project” > “Visual C++".
In my case select the CV3_CPP_64. If you follow the Step 4 then your project template file name and give the project name then “OK”.
To build and run project press “F5”. You should see the famous Lena image.
To edit and see the source code of project “Solution Explorer” > “Source Files” > double click on “main.cpp”
If you want to make new OpenCV project just repeat Step 5. There is no need to configure new project.